Concealed Bathroom Plumbing Retrofit: PEX Routing Standards Bali
Concealed Bathroom Plumbing Retrofit: PEX Routing Standards Bali
1) Specific Problem/Question
In Bali villa construction, bathrooms are frequently upgraded during renovation Bali projects: new mixers, rain showers, vanities, and smart toilets. The challenge is retrofitting concealed plumbing behind finished tile without future leaks, noise, or wall cracks. Which PEX routing standards and finishing practices should be followed in Bali to deliver durable, quiet, serviceable villa utilities that tolerate the tropical climate—while protecting premium interior finishing Bali surfaces?
2) Technical Deep Dive: How We Retrofit Concealed PEX Behind Finished Surfaces
Teville approaches concealed bathroom PEX routing as a finishing-critical operation. Unlike new-build rough-ins, retrofits must respect existing wall thicknesses, tile planes, and waterproofing. Our core principles:
- Minimize hidden joints: Use manifold “home-run” layouts to keep connections accessible (vanity, service niche). Where tees are unavoidable, place them in reachable zones, not inside solid masonry.
- Respect bend radius and expansion: Use gentle sweeps (typical minimum 8× outside diameter) and allow PEX to move in sleeves to avoid tile stress as hot lines expand/contract.
- Control condensation: Bali’s humidity drives cold-water pipe sweating. We wrap cold lines with closed-cell elastomeric insulation and isolate from plaster to prevent damp spots or mold behind tiles.
- Acoustic decoupling: Secure pipes on cushioned clamps, avoid tight contacts with masonry, and route away from hollow voids that amplify sound. This reduces water-hammer and flow noise in quiet villas.
- Penetration protection: Through studs or concrete, we sleeve PEX, add grommets at sharp edges, and install steel strike plates where pipes are within 32 mm of wall faces to resist fastener punctures.
- Waterproofing integration: At mixers, spouts, hand showers, and WC feeds, we coordinate back-box depths and sealing collars. PEX penetrations are sealed with flexible, membrane-compatible sealants; we flood-test wet areas before tiling.
Wall types and chasing strategy: Bali villas often use red brick or AAC block with cement render. For concealed routing, we chase vertically in straight lines, keeping hot on the left/cold on the right and avoiding diagonal runs. Chases are sized to fit a protective conduit (corrugated HDPE or smooth PVC) so PEX can slide and breathe. We avoid embedding bare PEX directly in cement; sleeves preserve serviceability and prevent abrasion.
Fixture interfaces: Concealed thermostatic mixers and diverters are mounted on rigid brackets fixed to solid backing. Outlet drops to rain heads are kept plumb in conduit with a stabilizer at the elbow box to ensure the trim plate sits flush on final tile. For basins, we terminate at offset angle-stop boxes in the vanity cavity, allowing neat furniture installation and easy filter/service access.
Thermal and chemical durability: Bali hot water commonly comes from solar or electric heaters. We specify PEX rated 100 psi at 82–93°C (180–200°F) and with high chlorine resistance per manufacturer data for local supplies. Mixing valves are set near 49°C (120°F) to reduce scald risk and material stress. UV is a silent killer for PEX; we keep coils shaded during works and never leave PEX sun-exposed in open shafts.
Support spacing and movement: Typical support intervals for PEX are around 800 mm (32 in) horizontally and about 1.2 m (4 ft) vertically, or per manufacturer. We add extra supports near valve bodies, offsets, and fixture drops. Loops or offset “Z” details absorb expansion on hot runs.
Noise and hydraulic behavior: To limit water hammer, we avoid abrupt direction changes, keep velocity reasonable (target under ~2.1 m/s in 16–20 mm lines), and place arrestors near solenoid-fed fixtures (smart WCs, washers). Cushioned clamps and isolated conduits stop ticking noises as pipes heat/cool.
Inspection and testing cadence: We rough-in, cap all outlets, pressure-test with water to 1.5× working pressure (commonly 8–10 bar) for at least 2 hours, then re-check after plaster repair and again post-waterproofing. Only after passing do we tile, fix trims, and commission. This multi-stage QA is essential to protect high-value finishes.
All of the above is executed to align with construction standards Bali projects demand and in coordination with our finishing teams to guarantee tile planes, joint reveals, and furniture lines remain pristine. See how we integrate MEP with finishes in our portfolio and construction process.
3) Materials & Standards
PEX pipe: PE-Xa/PE-Xb/PE-Xc SDR9 pipe for potable water, pressure/temperature rating suitable for local hot water systems. Select products with documented chlorine resistance per ASTM F2023 (or manufacturer equivalent) and oxygen barrier only where required (not needed for domestic water).
Fittings: Use one approved system consistently—expansion (ASTM F1960), cold-expansion with PEX sleeve (F2080), or crimp/clamp (F1807/F2159). Mixing systems can invite leaks. Stick to matched pipe/fitting brand approvals when possible.
Conduits and sleeves: Corrugated HDPE or smooth PVC for all in-wall runs, plus elastomeric insulation on cold water to mitigate condensation and on hot water to save energy and protect adjacent materials.
Mounting hardware: Rigid mixer boxes, brass female outlet elbows with secure plaster collars, cushioned pipe clamps, anti-vibration brackets, and metal strike plates over risk zones.
Sealants and membranes: Polymer-modified cementitious waterproofing, compatible primers, flexible sealant at penetrations, and factory gaskets for trim plates. Always coordinate with tile adhesive systems.
Reference standards (guidance):
- International Plumbing Code (IPC) / Uniform Plumbing Code (UPC) for routing, support, and protection concepts.
- ASTM F876/F877 for PEX pipe; ASTM F1960/F1807/F2159/F2080 for fittings; ASTM F2023 for chlorine resistance.
- ISO 15875 (PEX) as an international benchmark; verify if relevant SNI adoptions apply in Indonesia.
As of 2026, specific Bali-adopted PEX routing standards aren’t publicly consolidated. The National Plumbing Authority overview and international codes reinforce the same principles: proper routing, securing, and support before finishing. Teville always confirms local authority requirements and manufacturer instructions for each project.
4) Step-by-Step Retrofit Process (Teville Method)
Step 1 — Survey and mapping: We laser-scan the bathroom, trace existing services with non-destructive tools, and fix the new fixture layout with our finishing team to lock tile module, vanity clearances, and trim alignments.
Step 2 — Isolation and clean removal: Shut off, drain, and protect finishes not in scope. Carefully remove tiles in chase zones with minimal breakout. Cap old lines.
Step 3 — Layout and marking: Mark vertical runs, mixer heights, outlet centers, and chase limits. Confirm cavity depths for mixer bodies and allow for tile and adhesive thickness so trims sit flush.
Step 4 — Chasing and coring: Cut straight, plumb chases with dust control. Core penetrations through slabs/walls where needed. Deburr and fit PVC/HDPE conduits sized for pipe plus insulation.
Step 5 — Manifold installation: Place a compact manifold with individual isolation valves in an accessible vanity or service niche. Label each circuit (basin hot/cold, shower hot/cold, bidet spray, WC tank).
Step 6 — PEX routing and support: Pull color-coded PEX (red/hot, blue/cold) in conduits. Maintain bend radius, add expansion offsets on hot, and use cushioned clamps at recommended intervals. Keep routes vertical; avoid tight corners behind trims.
Step 7 — Fixture interfaces: Rigidly mount mixer/diverter bodies to backing. Set outlet elbows square to tile plane using leveling jigs. Install strike plates where fasteners may be used later (towel bars, cabinets).
Step 8 — Insulation and sealing: Insulate cold lines fully; insulate hot lines where proximity to finishes or energy efficiency suggests. Seal penetrations with flexible, membrane-compatible sealant and grommets.
Step 9 — First pressure test: Hydrotest to 1.5× design pressure (typ. 8–10 bar) for 2 hours. Record and sign off. Remedy any issues before closing chases.
Step 10 — Backfill and render: Backfill with non-shrink mortar, keeping conduits free. Re-render to plane, respect tile thickness, and leave accurate openings for trims.
Step 11 — Waterproofing and flood test: Apply full wet-area membrane with upturns and sleeve seals. Flood test 24–48 hours. Only proceed after documented pass.
Step 12 — Tiling and second fix: Tile with deformation joints at perimeters. Fit trims, rosettes, and angle stops using torque-best-practice to protect tile. Avoid over-tightening on fragile stone.
Step 13 — Flushing, sanitizing, and commissioning: Flush lines to clear debris, sanitize, set mixing temperatures, check simultaneous-use performance, and verify acoustic performance. Hand over as-built routing and valve map.
See how this integrated process protects finishes while upgrading utilities in our villa projects. For a tailored scope and program, use our cost estimation form.
5) Costs & Timeline (Guidance for Bali Retrofits)
Typical cost components per bathroom (IDR):
- Survey, design coordination, and as-builts: 3–8 million
- Selective demolition/chasing and protection: 5–15 million
- Manifold, valves, PEX, conduits, clamps: 8–20 million
- Fixture interface boxes/elbows and trims coordination: 5–12 million
- Render repair, waterproofing, and tiling reinstatement: 12–35 million
- Testing, commissioning, documentation: 2–5 million
- Contingency (hidden conditions): 10–15%
Timeline: A straightforward bathroom typically runs 10–15 working days: 1–2 days survey/protection, 1–2 days demo/chasing, 1–2 days manifold and piping, 0.5 day pressure test, 1–2 days backfill/render, 2 days waterproofing plus flood test, 2–3 days tiling/second-fix, 0.5 day commissioning. Complex layouts or structural constraints can extend to 3–4 weeks. Cure times (membrane, adhesives, grout) are non-negotiable to safeguard finish quality.
These ranges reflect our experience in Bali villa construction and assume mid-range fixtures. Final pricing depends on site access, wall composition, fixture selection, and finish restoration scope.
6) FAQ
Is PEX allowed for concealed bathroom retrofits in Bali?
PEX is widely used globally. In Bali, acceptance depends on local authority and project spec. We verify approvals case-by-case and align with manufacturer instructions and international benchmarks.
Which layout is better—manifold home-runs or branch-and-tee?
For retrofits, manifolds reduce hidden joints and simplify isolation. We prefer home-runs from an accessible vanity/manifold niche.
Will PEX sweat in Bali’s humidity?
Cold lines can condense heavily. We apply continuous closed-cell insulation and isolate pipes from render to prevent damp marks and mold.
How do you prevent noise and water hammer?
Gentle routing, cushioned clamps, controlled velocities, and hammer arrestors at fast-acting valves. Rigid mounting of mixer bodies also helps.
Available lands
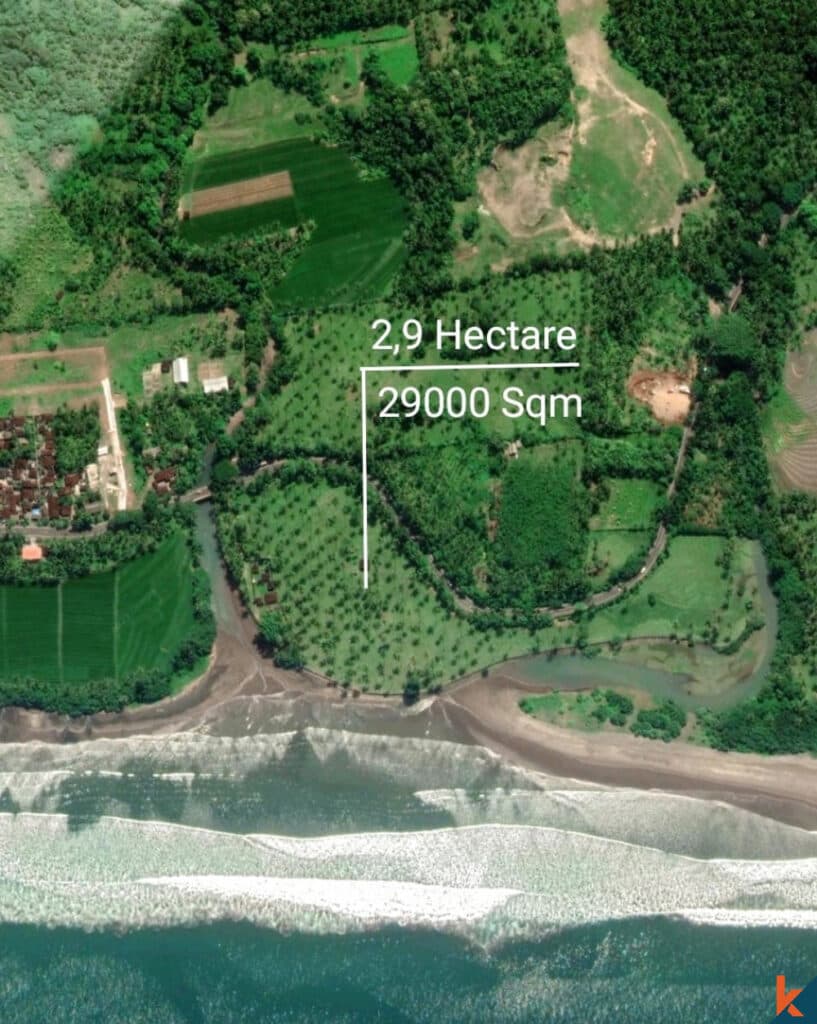
 29000 m²6 min$ 3857143Bali, Tabanan
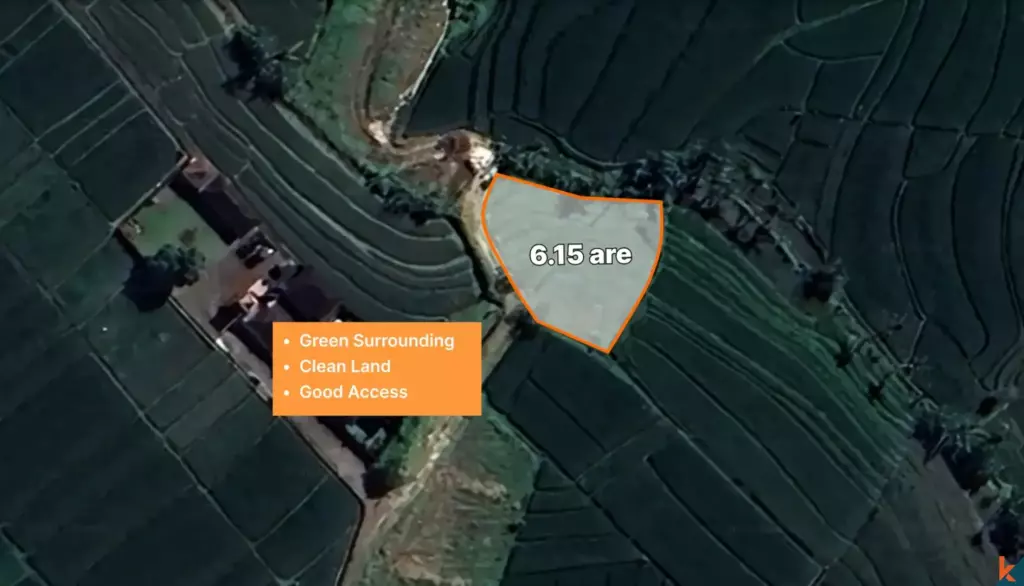 615 m²15 min$ 113608Bali, Tabanan
 2000 m²15 min$ 110837Bali, Karangasem
 700 m²15 min$ 90517Bali, Central Bali
 800 m²8 min$ 113300Bali, Ungasan
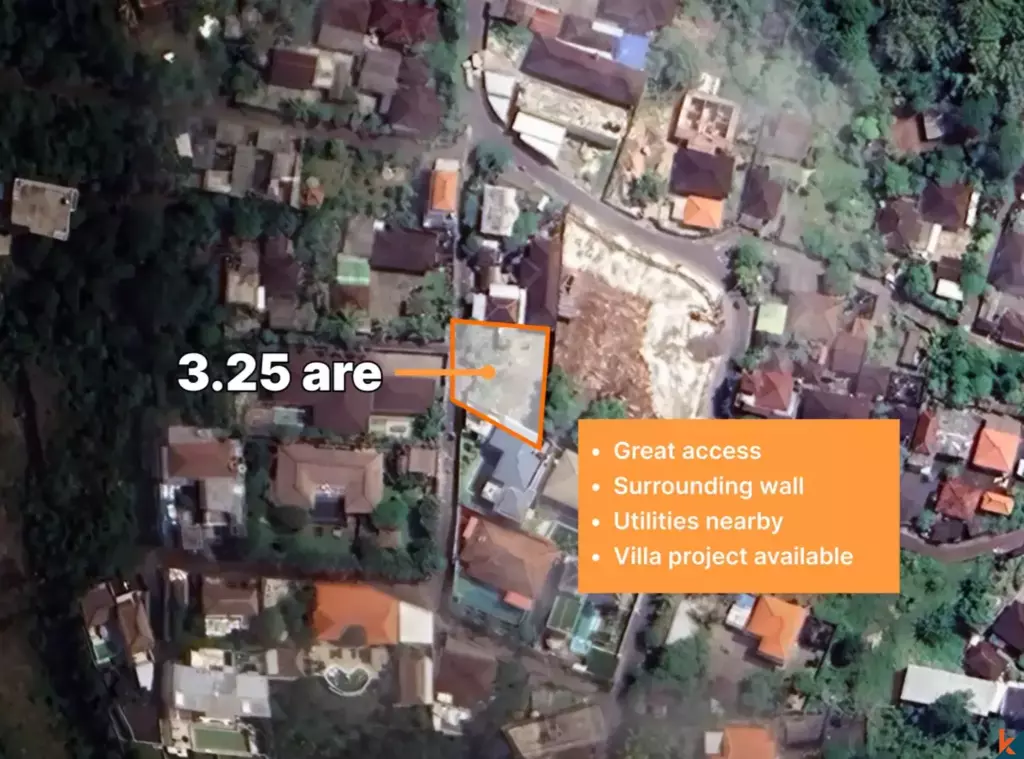 325 m²15 min$ 44472Bali, Ungasan
 7250 m²56 min$ 235714Bali, Tabanan
 2230 m²15 min$ 410573Bali, Padonan
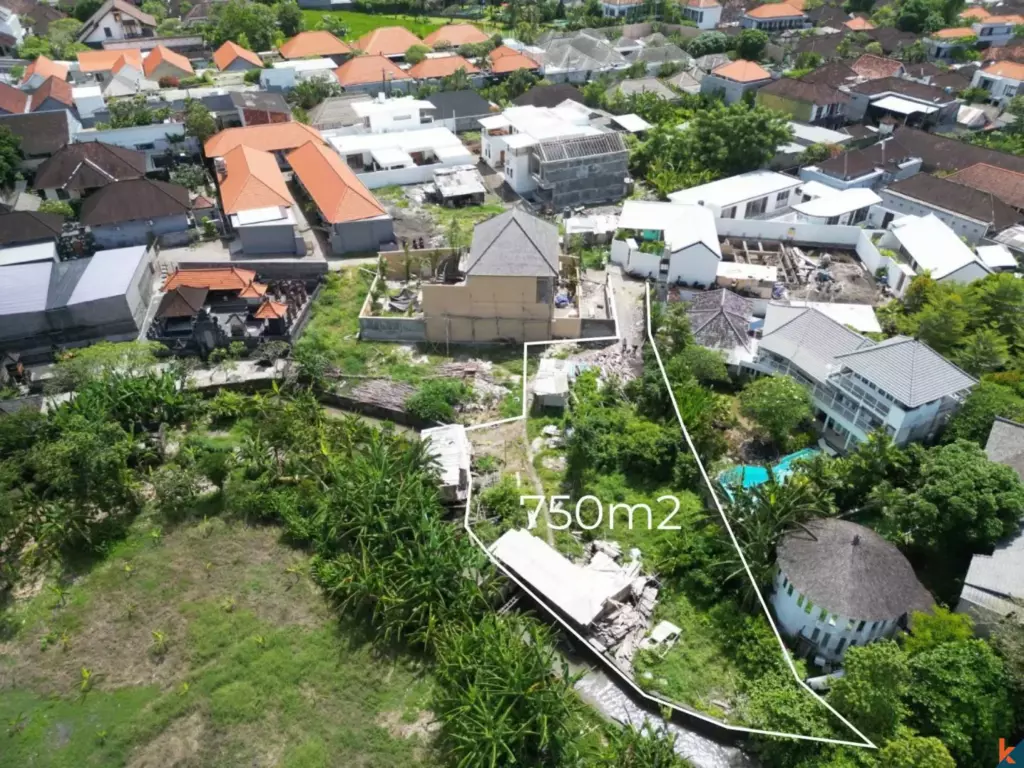 750 m²15 min$ 187038Bali, Kerobokan
 420 m²15 min$ 41897Bali, Tabanan
 1350 m²5 min$ 283467Bali, Pecatu
 3100 m²15 min$ 257697Bali, Tegallalang
 2680 m²10 min$ 1732759Bali, Pererenan
 18900 m²2 min$ 6912931Bali, Pecatu
 928 m²15 min$ 910123Bali, Pererenan
Planning a build in Bali?
Get a feasibility view, budget range and timeline from Teville.
Related guides
Integrated Furniture Fixings Hidden Brackets MEP Clearance Bali
Explore integrated furniture fixings with hidden brackets and MEP clearance in Bali. Learn installation tips, load guidance, and clean, accessible finishes.
8 min read
Epoxy Primer Moisture Barrier for Bali Interior Renovations
Explore epoxy primer and moisture barrier solutions for Bali interior renovations, delivering durable adhesion, moisture protection, and long-lasting finishes.
8 min read
Engineered Stone Countertop Fixing Support Standards Bali
Explore Bali s engineered stone countertop fixing and support standards. Installation tips, durability guidance, and compliance for lasting quality surfaces.
10 min read