Resin-Modified Cement Screed: Bali Floors Prep Application

Resin-Modified Cement Screed: Prep & Application for Bali Floors
1) The Specific Problem We Solve
In Bali’s tropical climate, standard sand-cement screeds often crack, debond, or powder under humidity, salt-laden air, thermal swings, and heavy villa use. Renovations add another layer of risk: mixed substrates, legacy tiles, and moisture trapped in slabs. The question owners and designers ask us is clear: how do we build a durable, flat, moisture-tolerant screed that accepts premium finishes—tile, stone, timber, microtopping—without delays to furniture installation or damage to villa utilities? Our answer is a correctly designed, resin-modified screed system tailored for Bali conditions.
2) Technical Deep Dive: What “Resin‑Modified” Means for Bali Floors
A resin-modified screed is a high-performance, resin-bonded or resin-enhanced mortar layer that acts as a leveling, load-distributing substrate for final finishes. Compared with traditional sand-cement screed, resin-modified systems offer superior bond strength, reduced permeability, faster cure, and higher abrasion resistance—critical for coastal villas, spas, kitchens, and high-traffic rentals across Bali.
There are two relevant families:
- Epoxy resin screeds (synthetic resin mortar): Two-component epoxy resin combined with graded quartz aggregates to form a 5–10 mm structural screed. Excellent adhesion and chemical resistance; ideal where moisture control, impact resistance, or thin build is required.
- Polymer-modified cement screeds: Cement-based screeds enhanced with latex/acrylic polymers. Good flexibility and bond, typically suitable for thicker build or where vapor permeability is desired. Often used under tiles/stone.
For Bali villas we most often recommend epoxy resin screeds when:
- Renovating over mixed substrates (old tiles, patchy concrete, stone). Mechanical grinding plus priming enables reliable adhesion and mitigates debonding.
- Working in wet rooms and near coastlines, where humidity and chlorides accelerate cement-based deterioration.
- Minimizing build height with 5–10 mm while still upgrading strength and flatness for large-format tiles or engineered timber.
Adhesion and moisture are decisive. Bali slabs often carry elevated moisture from recent pours, groundwater, or inadequate vapor barriers. Resin systems require substrate moisture to be assessed and, if necessary, managed via correct priming and curing windows. Where permitted by the manufacturer, specific epoxy primers can tolerate higher internal RH than cement-based adhesives and can be broadcast with sand to create a keyed surface for tile adhesive or topping.
Thermal and movement considerations are non-negotiable. Villas in Uluwatu, Canggu, and Ubud can experience intense solar gain on slabs, cold nights in uplands, and intermittent AC. We design screed bays with movement joints aligned to structural joints and thresholds, and we honor joints up through tile, wood, or microtopping. Around pools, spas, and rainscreens, we reinforce stress points and slope to drains at 1–2% while maintaining finish height targets for doors and built-ins.
Finish compatibility drives formulation:
- Large-format porcelain/stone: Requires SR1/SR2 flatness, high pull-off strength (>1.5 MPa), and sand-broadcast primer to lock in thinset mortar.
- Engineered timber: Balanced moisture strategy and flatness; we prevent hollow spots that telegraph through wood. Moisture content and acclimatization are scheduled with furniture installation.
- Microtopping/resin finishes: Low porosity, tight trowel; we control pinholes via priming and spike-rolling stages.
Build-ups near villa utilities (electrical conduits, water lines, underfloor services) are detailed to avoid heat accumulation, differential movement, or point loads. We encapsulate conduits with compatible mortar, maintain cover thickness, and isolate heat sources. In bathrooms and kitchens, we integrate waterproofing membranes above or below the screed per finish requirements and coordinate drainage bodies before we pour.
One commonly specified epoxy system in Indonesia is a solvent-free epoxy resin screed like Sikafloor-161 HC Screed, typically installed at 5–10 mm. The three-part mix (resin A, hardener B, quartz C) produces a workable, high-strength mortar bed that can be finished to tight tolerances and sand-broadcast for tile adhesion. Manufacturer limits on temperature (+10°C to +30°C) and relative humidity (<80%) are particularly relevant in Bali—dehumidification and airflow planning are part of our standard method statement.
Finally, logistics matter. Bali’s coastal dust, salt mist, and rapid weather shifts mean we stage mixing areas cleanly, protect primed surfaces from contamination, and monitor dew point to prevent amine blush on epoxy. Our supervision team logs batch numbers, pot life, ambient conditions, and substrate tests to ensure repeatable quality and traceability—especially important for phased renovations where areas reopen while works continue.
3) Materials & Standards We Rely On
Core materials for epoxy resin-modified screed builds:
- Primer: Low-viscosity epoxy primer (e.g., Sikafloor-161 HC) at 0.3–0.5 kg/m², applied to prepared concrete to consolidate and promote adhesion.
- Resin mortar: Epoxy resin A + hardener B + dried graded quartz sand (Comp. C), mixed to manufacturer ratio (for example, approx. 2.37 kg A + 0.63 kg B + 18 kg quartz per set) to form a trowelable 5–10 mm screed.
- Broadcast sand: Clean, oven-dried quartz 0.4–0.8 mm to saturation when a keyed surface for tile adhesive or leveling compound is required.
- Crack repair: Low-viscosity epoxy for injection and flexible sealant at active joints; glass/carbon scrim where reinforcement is specified.
- Ancillaries: Mixing drills, slow-speed paddles, gauge rakes, steel trowels, spike rollers, moisture meters, pull-off test dollies.
Key standards and targets we apply in Bali villa construction and renovation:
- Surface preparation: ICRI CSP 3–5 profile after grinding/shot-blasting; substrate soundness with pull-off strength >1.5 MPa (preferably >2.0 MPa for heavy use).
- Moisture testing: ASTM F2170 in-situ RH; where RH is high, use approved primers/barriers per manufacturer guidance. Dew point safety margin ≥3°C.
- Flatness: BS 8204 / SR2 or better for large-format tiles; tighter tolerances at thresholds and wet area falls.
- Resin flooring classification: EN 13813 SR (synthetic resin screeds) for performance labeling.
- Health & VOC: Use solvent-free epoxies; ensure ventilation compliance during cure.
Always follow the current product datasheet and local code. For reference, see the manufacturer guidance for Sikafloor-161 HC Screed (solvent-free epoxy resin mortar for 5–10 mm industrial floors) at Sika Indonesia.
4) Step-by-Step Process for Bali Conditions
Step 1: Survey, coordination, and mock-ups
- Identify finish type (tile/stone, timber, microtopping) and target build-up heights relative to doors, drains, and furniture plinths. Confirm movement joint layout.
- Locate villa utilities; fix conduit routes and protection. Approve a small on-site mock-up for texture, broadcast, and adhesion method.
Step 2: Substrate testing
- Moisture (ASTM F2170), slab temperature, and dew point calculations. Pull-off tests at representative zones. Record results in QA logs.
Step 3: Mechanical preparation
- Grind/shot-blast to ICRI CSP 3–5. Remove laitance, paint, oil, and weak patches. Vacuum to dust-free condition.
- Treat cracks: rout and inject with low-viscosity epoxy; install flexible sealant for active joints and honor through screed and finish.
Step 4: Priming
- Apply epoxy primer at 0.3–0.5 kg/m². For porous areas, apply a second “wet-on-wet” coat. Verify no pinholes. Respect recoat windows given Bali humidity.
Step 5: Mixing the resin screed
- Precondition materials to 20–25°C. Mix resin A and hardener B for 2–3 minutes, then gradually add dried quartz (Comp. C) until homogeneous. Observe pot life.
Step 6: Placing and levelling (5–10 mm)
- Pour onto tacky primer and spread with gauge rake to target thickness; compact and close with steel trowel. Form falls to drains (1–2%).
- Where tile/stone will be laid, sand-broadcast to excess for mechanical key. For resin/microtopping, close tightly and de-bubble with a spike roller if specified.
Step 7: Edges, penetrations, and utilities
- Isolate perimeter with foam strip. Maintain minimum cover above conduits. Reinforce around drain flanges and door thresholds.
Step 8: Curing and climate control
- Maintain ambient +10°C to +30°C, RH <80%, and protect from water. Typical light foot traffic after 16–24 hours; full cure per datasheet. Use dehumidifiers during wet season.
Step 9: QA and finish readiness
- Check flatness, thickness, adhesion, and surface profile. Remove unbound sand. For timber, confirm MC and acclimatize planks. For tiles, follow thinset timing over broadcasted surface.
Step 10: Handover and protection
- Install breathable protection before other trades. Coordinate with furniture installation to avoid point-loading green screeds and to maintain finish tolerances for built-ins.
5) Costs & Timeline in Bali
Indicative 2026 budget ranges (materials + labor) for epoxy resin-modified screed at 5–10 mm, assuming standard access and preparation:
- Base system: IDR 600,000–1,400,000 per m² (primer + resin mortar + sand broadcast if required).
- Substrate preparation: IDR 150,000–350,000 per m² (grinding/repairs) depending on condition.
- Moisture mitigation/special primers: IDR 80,000–180,000 per m² when needed.
- Complex details (drains, ramps, thresholds): Item-based allowances.
Schedule for a 100 m² villa zone under tropical conditions:
- Day 1: Survey, masking, grinding, vacuum.
- Day 2: Crack repair, joint treatment, priming.
- Day 3: Screed placement (5–10 mm), sand broadcast.
- Day 4–5: Controlled cure, climate management.
- Day 6: QA checks, de-sanding, readiness for tiling/finishes.
Wet-season RH spikes may extend cure or require dehumidification. We sequence works to minimize disruption to renovation Bali projects and to align with interior finishing Bali tasks and villa utilities inspections.
6) FAQ: Resin-Modified Screeds for Bali Villas
Q1: How does a resin-modified screed differ from a standard sand-cement screed?
Resin-modified screeds achieve much higher bond strength, lower permeability, faster cure, and better abrasion resistance. This reduces cracking, hollow spots, and moisture-related failures common in Bali’s climate.
Q2: Can it be installed over existing tiles during renovation Bali projects?
Yes—after mechanical grinding to expose a clean, rough profile and thorough priming. Pull-off testing is done to verify adhesion. Delaminated tiles must be removed.
Q3: What thickness is recommended?
Epoxy resin screeds typically 5–10 mm. We select thickness based on flatness targets, load, and whether drainage falls are required. Thicker polymer-modified cement screeds may be used where build height allows.
Q4: Is it suitable for wet rooms, spas, and coastal zones?
Yes. Resin screeds perform well in humid, salt-laden environments and can be combined with waterproofing membranes and appropriate slip-resistant finishes.
 2144 m²11 month(s)from 104.000 USD
Narayana
 3127 m²9 month(s)from 177.000 USD
Mukunda
 164 m²7 month(s)from 79.000 USD
Private: Haridas Villas, Tegallalang

Want to calculate?
 3173 m²6 month(s)from 125.000 USD
TALA FOUR
 172 m²8 month(s)from 120.000 USD
Keshava
 3124 m²6 month(s)from 123.000 USD
TALA 8
 1from 198.000 USD
Private: Haridas Villas
164 m²7 month(s)from 79.000 USDTALA TWO
 3104 m²11 month(s)from 99.000 USD
TALA 100
 3180 m²7 month(s)from 142.000 USD
Vasudeva
 4344 m²16 month(s)from 290.000 USD
Radha
Start With Real Numbers, Not Guesses
Before finalizing your finishing works plan, check realistic cost ranges for your Bali villa project.
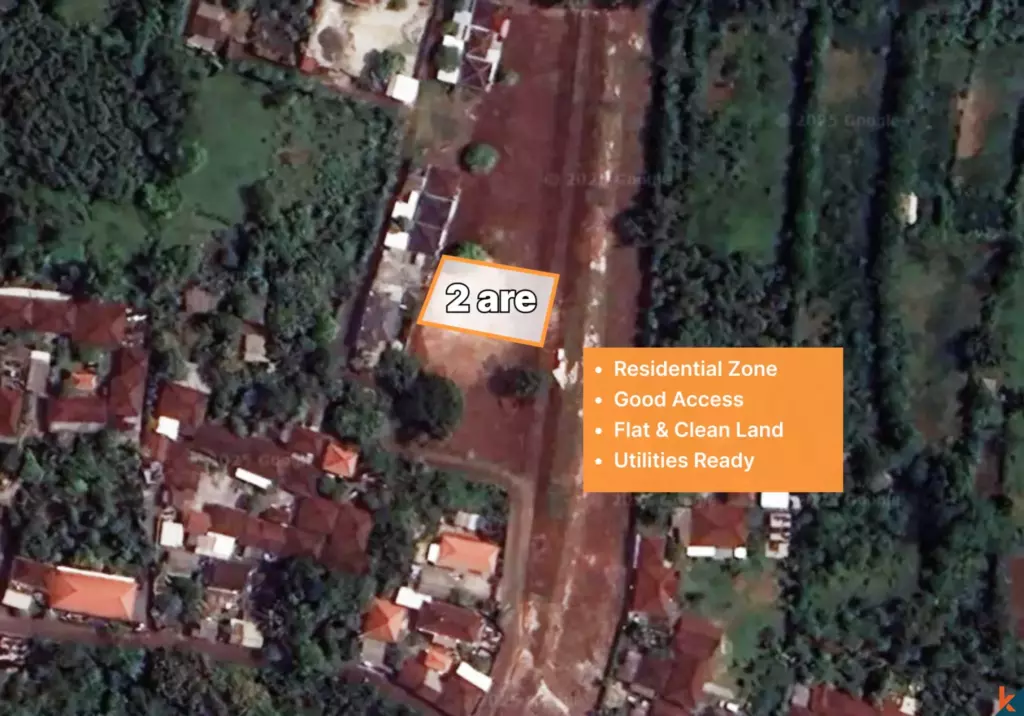
Available lands
 1350 m²5 min$ 283467Bali, Pecatu
 1100 m²8 min$ 280419Bali, Ungasan
 1720 m²2 min$ 241478Bali, Tabanan
 5815 m²5 min$ 815740Bali, Tabanan
 2680 m²10 min$ 1732759Bali, Pererenan
 615 m²15 min$ 113608Bali, Tabanan
 1950 m²7 min$ 150092Bali, Tabanan
 1410 m²15 min$ 390702Bali, Tabanan
 200 m²5 min$ 59113Bali, Bukit
 585 m²8 min$ 165702Bali, Mengwi
 1000 m²10 min$ 384852Bali, Canggu
 800 m²10 min$ 307882Bali, Tibubeneng
 2500 m²5 min$ 609606Bali, Kedungu
 7000 m²36 min$ 284483Bali, Gianyar
 2400 m²7 min$ 496552Bali, Canggu
Planning a build in Bali?
Get a feasibility view, budget range and timeline from Teville.
Related guides

Marine-Grade Fixings for Bali Joinery: Corrosion Protocols
Explore marine-grade fixings and corrosion protocols for Bali coast joinery. Learn materials, maintenance tips, and best practices to extend timber durability.
10 min read
Resin-Infused Plaster Finishes: Anti-Salt Systems Bali
Expert technical guide: Resin-Infused Plaster Finishes: Anti-Salt Systems Bali
8 min read
Prefinished Timber Joinery: Silicone Seals Fixings Bali
Professional prefinished timber joinery installation in Bali with silicone seals and fixings for durable weatherproof performance and a premium finish.
10 min read